By Ragdoll Hit · November 10, 2026
Ragdoll Hit Stickman Guide: Waves, Weapons, Surviving
How Ragdoll Hit Stickman's wave combat really works — the phase map from wave 1 to 30, weapon picks by room, and the habits that keep you off the floor.
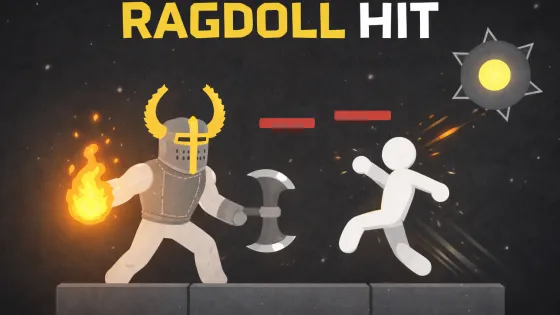
Ragdoll Hit Stickman takes the flagship's one-on-one physics combat and throws crowds at it. Enemies pour in, weapons lie around the room, and the question stops being "can I beat this opponent" and becomes "can I still be standing when the wave ends." Most players wing it, get flopped on around wave six, and assume the game got hard. It didn't — the game changed phases, and nobody told them. This guide is the phase map, plus the weapon decisions and the habits that carry a run from wave one into wave thirty.
Play it here, free, no download: Ragdoll Hit Stickman.
Coming From Ragdoll Hit? Read This First
The physics brain transfers. The duel habits don't.
Everything you learned reading momentum in the flagship still works here — swings carry weight, hits land by angle, bodies tumble honestly. What actively hurts you is the spacing instinct. In Ragdoll Hit, committing to a big swing against one opponent is fine: there's exactly one direction danger can come from. In wave combat, a committed swing is a window for three enemies at once, and the center of the room — perfectly safe real estate in a duel — is where every enemy can reach you at the same time.
The single biggest adjustment: in the flagship you close distance to punish. Here you open distance to survive. The open floor behind you is your real health bar, and the best swing in the game still loses to getting surrounded.
The Phase Map
Waves 1–5: the quiet tutorial
The early waves are forgiving on purpose — they're teaching the weight of a swing, how long recovery takes, and how enemies cluster. Don't rush them. Use them deliberately: notice how far each swing drags your body, and miss once on purpose early. Knowing exactly how exposed a missed swing leaves you is the foundation everything later stands on.
The wall around wave 5–6
This is where runs die, and where most players misdiagnose the problem. Around wave five or six the crowds thicken past what reflexes alone handle — the game stops feeling like luck and starts demanding choices. If you're dying here, the issue is almost never damage. It's position: you're swinging from the middle of the room. Get to an edge, let enemies trail you into a line instead of a circle, and thin the front of the line. The wall doesn't move — but once you fight it from the edge, it stops being a wall.
Waves 10+: the queue game
Past the wall, wave combat becomes crowd logistics. Ragdolls interfere with ragdolls: enemies clutter into each other, trip, block, and pile up on their own — half your crowd control is refusing to spread them out. Pull the congestion into a lane, work it with reach, and only commit a heavy swing into clusters you've already staggered. The runs that reach deep waves aren't the ones hitting hardest; they're the ones that never let the room become a circle.
Deep runs: the rhythm tax
The game's own tips talk about wave thirty, and the difficulty curve to get there never switches to smarter duels — it's density, always density. What changes at depth is the cost of a mistake: the same over-committed swing that cost you position at wave eight ends the run at wave thirty. The players still standing are the ones who respected swing recovery from wave one — the rhythm was always the test.
Weapon Picks by Room

Weapons lie around the room and can be dropped and re-grabbed mid-fight — and the actual skill of this game isn't dealing damage, it's matching the tool to the room. The rule that decides most swaps:
| The room right now | Pick up | Why |
|---|---|---|
| Enemies converging from several sides | Reach weapon | Holds a lane at arm's length so the crowd stays a queue, not a ring |
| A cluster you've already staggered | Heavy weapon | Committed swings are only safe on bodies that can't punish the recovery |
| You just missed / need to reset | Fast weapon | Short recovery buys back your footing when you're exposed |
| Calm edge, line forming | Whatever hits hardest, once | One clean swing, one step back — never a second swing on a hope |
Two disciplines that follow from the table. First: swap for the room, not the damage — a weaker weapon that fits beats a stronger one that doesn't, and dropping a favorite is a skill, not a failure. Second: the shop instinct from the flagship doesn't apply — there's no coin economy here, no saving up. Weapons are room-state decisions made in real time. (The flagship's buy-order logic lives in our weapons guide, which is a different game mode with a different economy.)
The Two Styles, Mixed Honestly
The safe way — reach weapon, edges, queue the room — survives longest. The chaotic way — heaviest thing on the floor, wade in, let physics do the comedy — is worse for survival and better for stories. Most good runs are the safe way with scheduled chaos: patient lane-play, then a deliberate heavy commitment when the crowd is staggered and it's actually free. The mistake isn't picking a style; it's letting the chaotic one pick itself when you're tired.
FAQ
Ragdoll Hit or Ragdoll Hit Stickman — which should I play?
One-on-one physics duels with a campaign and a weapon shop: Ragdoll Hit. Endless crowd combat where positioning beats power: this one. Same physics heart, different games — the wave mode is the action-arcade pace of the two.
Does it end? Is there a final boss?
The waves climb without a finish line — density is the difficulty, all the way up. The campaign-and-bosses structure belongs to the flagship (all eight of those fights are in our boss guide).
What's the best weapon?
There isn't one, and that's the design. Reach for lanes, heavy for staggered clusters, fast for recovery — the "best" weapon is whichever one the room is asking for.
Is it free? Does it work on phones?
Free, in the browser, no download — desktop keyboard on desktop, on-screen controls on phones and tablets.
Keep Playing
- Ragdoll Hit Stickman — the game this guide covers
- Weapons guide — the flagship's shop economy, buy order included
- Boss guide — the campaign side of the family, all eight fights